As we enter into the harsh winter months, we wanted this edition of the Before, During & After project summary to highlight the impact severe levels of wind and rain can have on sub standard properties. The property in question had significant damp & dry rot issues.
Before
Back in 2010, sections of the external render were in need of immediate replacement as they had deteriorated noticeably over time. Following their removal, the builder’s in charge of the repair work recommended that the entire external render be removed. The rational being that the fully exposed stonework would look fantastic once it had undergone extensive cleaning. They suggested a sand blasting process and then re-pointing using a mixture of sand and cement.
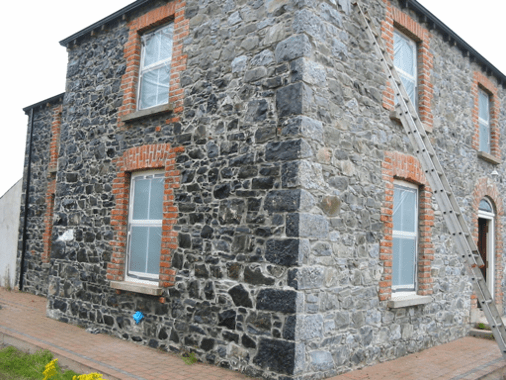
Unfortunately for the property owner, this method of cleaning caused damage to the stone surface. In addition, the incorrect material was used to carry out the re-pointing.
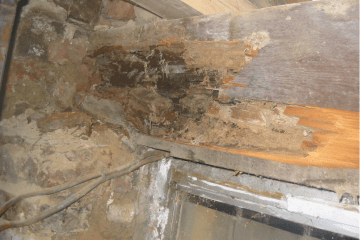
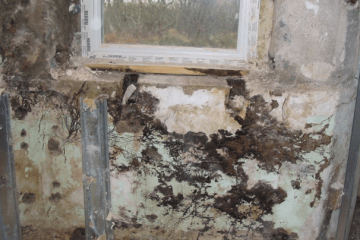
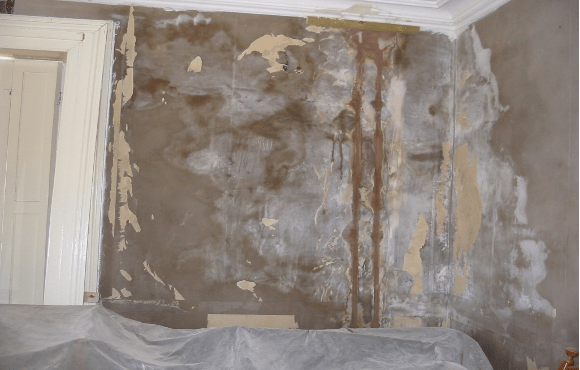
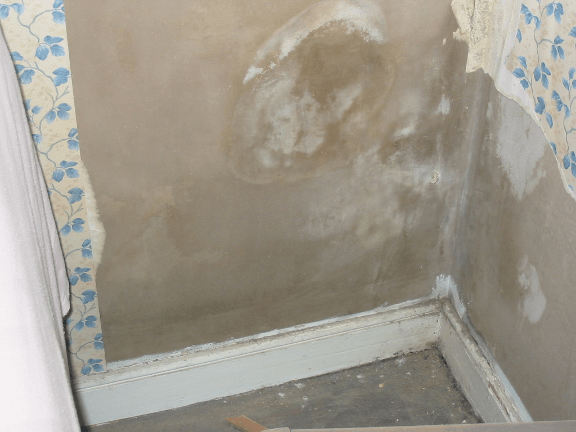
Situated about 1 mile from the coast on an exposed site, rain water penetrated through the external walls of the building throughout the winter months. This resulted in damp patches appearing on the internal plaster finish along with dry rot attacking floor joist ends, timber heads above windows and timber paneling surrounding windows.
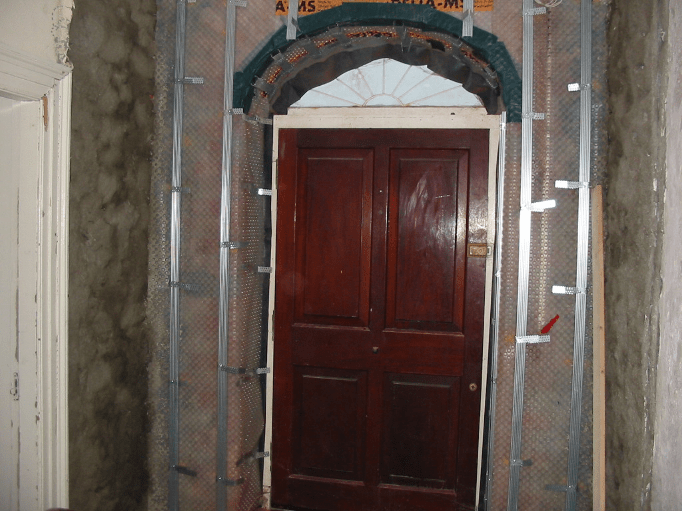
During
Fast forward to 2013 and the owner of the property reached out to us in an effort to rectify the issues. Harry and Stephen proposed rendering the external walls of the property using lime mortar. However, the owner requested that the exposed stone finish remained, thus the damp issue had to be addressed internally.
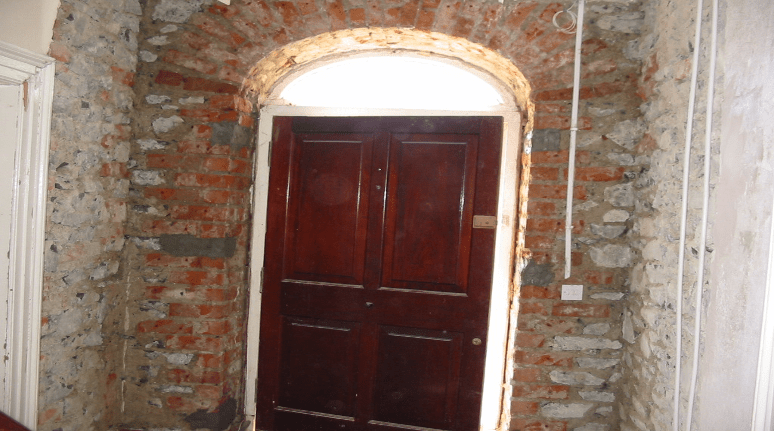
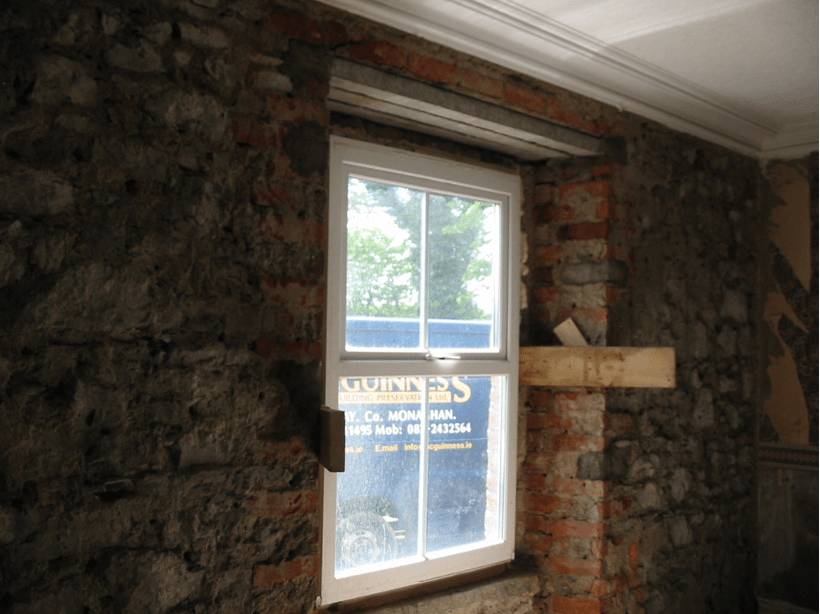
The remedial work involved the removal of all timber paneling around windows and all plaster on the internal side of the external walls. Furthermore, every timber head above windows was replaced using concrete lintels and each floor joist end affected by dry rot was replaced. Sterilisation and irrigation of all walls attacked by dry rot was carried out in tandem with precautionary treatment being applied to joist ends not yet impacted by dry rot.
After
Following this the process of reinstatement work began. Firstly, a membrane system was fitted to every external wall. Metal studding was then fitted to walls lined with membrane. Next, insulation and plasterboard was attached to the metal stud.
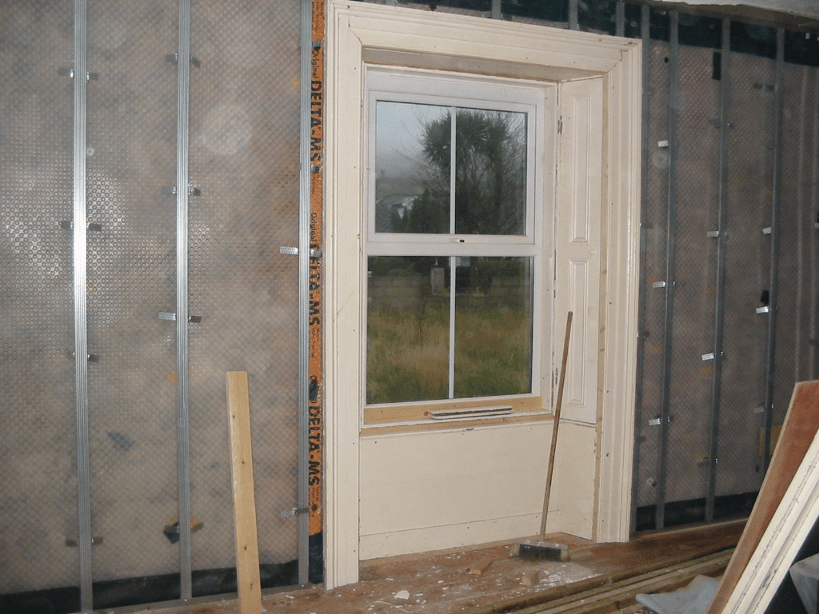
To finish, a coat of skim-coat was applied to create a smooth finish, new timber skirting was added and all timber paneling at windows were refitted.